




Table of Contents
- Why Site Planning Matters
- Start With Property Research
- Review Zoning and Land Use
- Study the Site Conditions
- Confirm Access and Utilities
- Plan Drainage and Grading
- Prepare a Complete Site Plan
- Build a Permit Checklist
- Avoid Common Planning Mistakes
- Complete a Preconstruction Review
A successful home project starts with the land itself, not only with a floor plan or exterior style. Before committing to a layout, property owners should understand the limits and opportunities of the parcel. Thoughtful residential development planning helps identify constraints involving boundaries, access, utilities, drainage, and local regulations, while changes are still easier to make.
Every parcel is different, and even a lot that appears open and level can contain easements, soil limitations, flood concerns, or setback restrictions. Reviewing these details early can help homeowners, builders, and small-scale developers make better decisions before construction drawings, clearing, or major purchases move forward.
1. Why Site Planning Matters
Site planning connects the proposed home to the practical realities of the property. It determines whether the structure, driveway, parking, utility connections, septic area, and outdoor spaces can fit together without conflicting with required setbacks, drainage paths, or protected features.
Skipping this work can lead to expensive redesigns, delayed permits, avoidable grading costs, and construction issues that are difficult to correct after work begins. Local rules differ by jurisdiction, so planning and building departments should always be consulted for the current requirements that apply to a specific parcel.
2. Start With Property Research
Early land development research should begin with the documents that define ownership and use rights. Gather the deed, recorded plat, prior surveys, available site plans, and any recorded restrictions before developing a concept layout.
Documents and questions to review
- Confirm that the legal description matches the parcel being considered.
- Locate property corners, boundary dimensions, and recorded rights-of-way.
- Identify utility, drainage, access, and conservation easements.
- Review covenants or neighborhood restrictions that may affect home size, placement, or exterior features.
- Check available floodplain, environmental, and prior permitting records.
- Determine whether recorded access rights provide practical entry for construction vehicles.
3. Review Zoning and Land Use
Zoning does more than determine whether a home is allowed. It can regulate lot width, minimum lot area, building height, density, parking, driveway placement, accessory structures, and the distance a building must remain from each property line.
Identify the current zoning district and review permitted residential uses, front, side, and rear setbacks, and any overlay districts affecting the lot. Ask the local jurisdiction whether the proposal could require a variance, special exception, subdivision review, or another land-use approval. Online zoning information is useful for preliminary research, but current local guidance should control the final design.
4. Study the Site Conditions
Physical site conditions often determine where a house can reasonably sit. Topography, soil characteristics, rock, wooded areas, streams, wetlands, existing structures, sun exposure, and prevailing winds can all influence the layout and construction approach.
Walk the property in different conditions when possible. After a heavy rain, standing water, drainage channels, soft ground, and runoff patterns may be more visible.
5. Confirm Access and Utilities
A parcel can be legally buildable yet still present challenges for access and service connections. Review road frontage, proposed driveway grade, sight distance, emergency access, and the route construction vehicles will use to reach the building area.
For utilities, distinguish between service being available nearby and a connection being feasible at the proposed house location. Ask providers whether service lines have sufficient capacity, whether extensions are needed, who pays for connection work, and whether existing lines conflict with the driveway or building footprint. Where public sewer is unavailable, plans for a well and an on-site wastewater system should be coordinated early. The EPA explains how septic systems work and why their location must be considered alongside wells and nearby water resources.
6. Plan Drainage and Grading
Water management deserves close attention because runoff directed toward a foundation, driveway, or neighboring property can create lasting problems. Map the existing drainage pattern before changing the land, then plan finished grades that carry water away from structures.
- Locate ditches, swales, culverts, streams, and existing outfalls.
- Consider how roofs, driveways, and patios will increase hard surfaces.
- Determine whether retaining walls, engineered slopes, or stormwater controls may be needed.
- Plan temporary erosion controls before clearing or earthwork begins.
- Protect drainage routes so grading does not create new runoff conflicts.
7. Prepare a Complete Site Plan
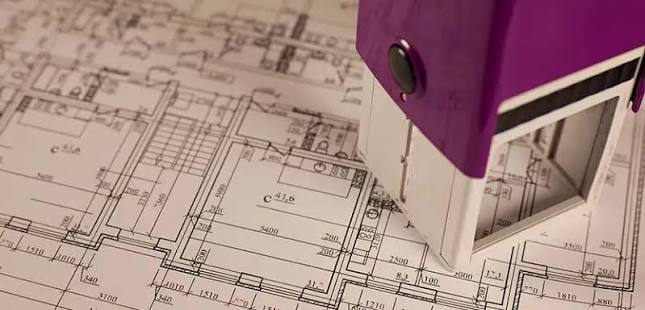
A clear site plan shows how the proposed home fits the property and helps reveal conflicts before they become field problems. Depending on local requirements, the plan may need to show property lines and dimensions, a north arrow, scale, setbacks, easements, existing features, proposed structures, driveway locations, parking, utility routes, drainage directions, and limits of clearing.
The plan is more than a permit document. It is a coordination tool that allows owners, reviewers, and builders to see whether the house footprint interferes with a septic field, utility easement, drainage path, mature trees, or a future addition area.
8. Build a Permit Checklist
Organizing approvals in advance can reduce missed steps and improve the quality of a permit submission. A typical checklist may include:
- Zoning and land-use confirmation.
- Building permit and site-plan requirements.
- Driveway or entrance approval, when required.
- Utility, well, or septic approvals.
- Erosion, stormwater, floodplain, or environmental reviews.
- Surveys, drawings, reports, ownership records, and application forms.
- A log for agency comments, revisions, and resubmission dates.
9. Avoid Common Planning Mistakes
Common mistakes include designing a home before measuring setbacks, relying on online parcel maps as final boundary evidence, overlooking utility easements, and assuming a recorded road can handle construction traffic. Other frequent issues include underestimating grading costs, placing a septic area where future expansion is desired, and clearing land before approvals are confirmed.
For example, moving a proposed home footprint early may preserve a better driveway route, leave adequate room for a septic field, reduce the need for retaining walls, and protect a more usable yard. Those adjustments are generally simpler on a site plan than after excavation begins.
10. Complete a Preconstruction Review
Before mobilizing equipment, walk through the approved plan with the builder and confirm that the latest design matches the permitted documents. Mark property lines, setbacks, utilities, protected areas, the home location, and the construction entrance in the field as appropriate.
Also, verify temporary drainage and erosion controls, review the driveway plan, and keep permits, reports, approved drawings, and agency correspondence together. Careful preparation does not eliminate every surprise, but it gives the project a stronger foundation and makes site decisions easier to manage throughout construction.


